

How To Install A Tile Backsplash In Your Kitchen
If you are wondering how to install a backsplash yourself, you lot've come to the correct identify. Installing a kitchen backsplash is a quick and easy way to update and totally transform the look and feel of your space.
Whether you lot're looking to create a harmonious add-on, a bright accent or a design-led argument, backsplash tiles are a stylish, hygienic and durable solution that also add together color, design and texture to the space.
If you lot are looking for kitchen ideas, tiles are the least confusing way to upgrade your kitchen backsplash over a consummate renovation. A new backsplash is something that could be installed in a weekend, but gives your kitchen years of fresh new life.
How to install a kitchen backsplash
If you are considering installing a backsplash yourself, bear in mind that some kitchen tile ideas will exist trickier to install than others.
The simplest are chequerboard foursquare tiles, while herringbone patterns are more difficult to install at edges. Plus, if your space is awkward or includes lots of electrical sockets, y'all will find the installation more difficult.
That said, it is achievable for fifty-fifty beginners to DIY with the right tools.
1. Have the correct materials
Kevin Lamming, Projection Consultant at Artisans of Devizes, says installing backsplash ideas for kitchens is relatively straightforward, simply you need to exist prepared with the correct materials.
You lot will need:
- Tiles
- Adhesive
- A notched trowel for applying the adhesive
- Tile spacers
- A pencil
- A spirit level for directly lines
- A clean clammy cloth
- Grout
- A plastic trowel for applying the grout
Depending on the wall or surface, y'all may also need sandpaper, filler and primer.
ii. Work out the tile layout
Kamila Chalfin, marketing and make manager at Tile Giant, says: 'This is done to ensure that every bit many full tiles are laid as possible, with minimum cut and waste of tiles.
'To practice this, starting time by marking the center of the wall using your measuring record and pencil. Using a vertical spirit level against this mark, make a line down the centre of your wall. This is where you will start your tiling from.
'From this line, you can work out the best way to lay your tiles and how many you volition need in a row.
'Hold a tile over the center line that you accept just drawn. Hold a second tile next to this tile with a pocket-size space for grout. Continue this until y'all reach the terminate of your wall and count the number of tiles as you go.
'When you get to the edge of the wall, the cut tile you end up with should exist the same that's needed at the other terminate of the wall.'
3. Seal the surface
'If you're tiling on to fresh plasterboard, make sure it is sealed with a primer post-obit the manufacturer's instructions,' advises Damla Turgut, founder of Otto Tiles & Design
iv. Make clean and fill up
If the wall already has a couple of coats of paint, this will act as a primer.
'Brand sure the wall surface is clean of dust and loose debris,' says Damla. 'Fill up in any cracks or holes and sand dorsum for an fifty-fifty surface.'
5. Add together adhesive
Damla says: 'Apply a high-quality adhesive to the wall starting at the bottom, nearest to your work surface. Make sure you add a generous and fifty-fifty layer of agglutinative using a notched trowel.'
6. Starting time layering your tiles
Start to employ your offset row of tiles using a moderate even pressure.
Damla's top tip? 'Piece of work forth in rows using tile spaces on all four sides of each tile to ensure gaps are uniform, and use a spirit level to brand sure they're level.'
7. Use a tile cutter for wall edges
Where at that place is non plenty room at wall edges, measure out the size of the tile you need and, using a tile cutter, score a line along the tile and employ calorie-free force per unit area to intermission the tile along the score.
Don't forget to factor in the size of the tile spacer when taking your measurements.
8. Go rid of excess adhesive
Wipe off any excess adhesive before it dries with a clean, clammy fabric.
9. Get the grout out
Once the adhesive has dried, yous can grout between the tiles. Remove the spacers and apply/push the grout generously into the gaps between each tile, using a trowel. Ensure the grout lines are shine and fifty-fifty. Before information technology dries, wipe backlog with a clean damp cloth.
Work as fast as yous can, as it tends to harden rapidly.
When choosing a grout color, try to friction match it to the principal color or background color of your called tiles for a seamless await – specially important to maximize infinite in pocket-sized kitchen ideas.
If yous're looking for a contrast, yous can always choose lighter or darker for a dissimilar cease, merely carry in mind that lighter-colored grouts show dirt more than hands.
Darker grouting, for example, can add a modern, industrial look to an otherwise evidently white kitchen backsplash.
10. Clean up and finish off
Every bit your grout dries y'all may discover a powdery stop across your tiles – this is just a film of dried grout. Once you are happy that the grout has completely stale, yous can wipe down the tiles to reveal the shiny, stop effect.
Tile Giant'southward Kamila Chalfin says: 'Merely take a clean clammy sponge at a 45 degree angle, and using big swiping motions, wipe away the residue. Proceed cleaning your sponge in between removing the residue for the all-time results.
'Yous can then use a clean fabric to actually complete the projection and polish them up to a sparkling finish.'
xi. Enquire your retailer for specific installation advice
Ever ask your retailer for communication on installation, as they will have installation packs for each type of tile. These include recommendations on how tiles should be laid.
Damla Turgut, founder of Otto Tiles & Design e'er recommend that their Zellige, Bejmat and Terrazzo tiles are installed with little-to-no gap in between for the best visual consequence. They also include sealant and care instructions.
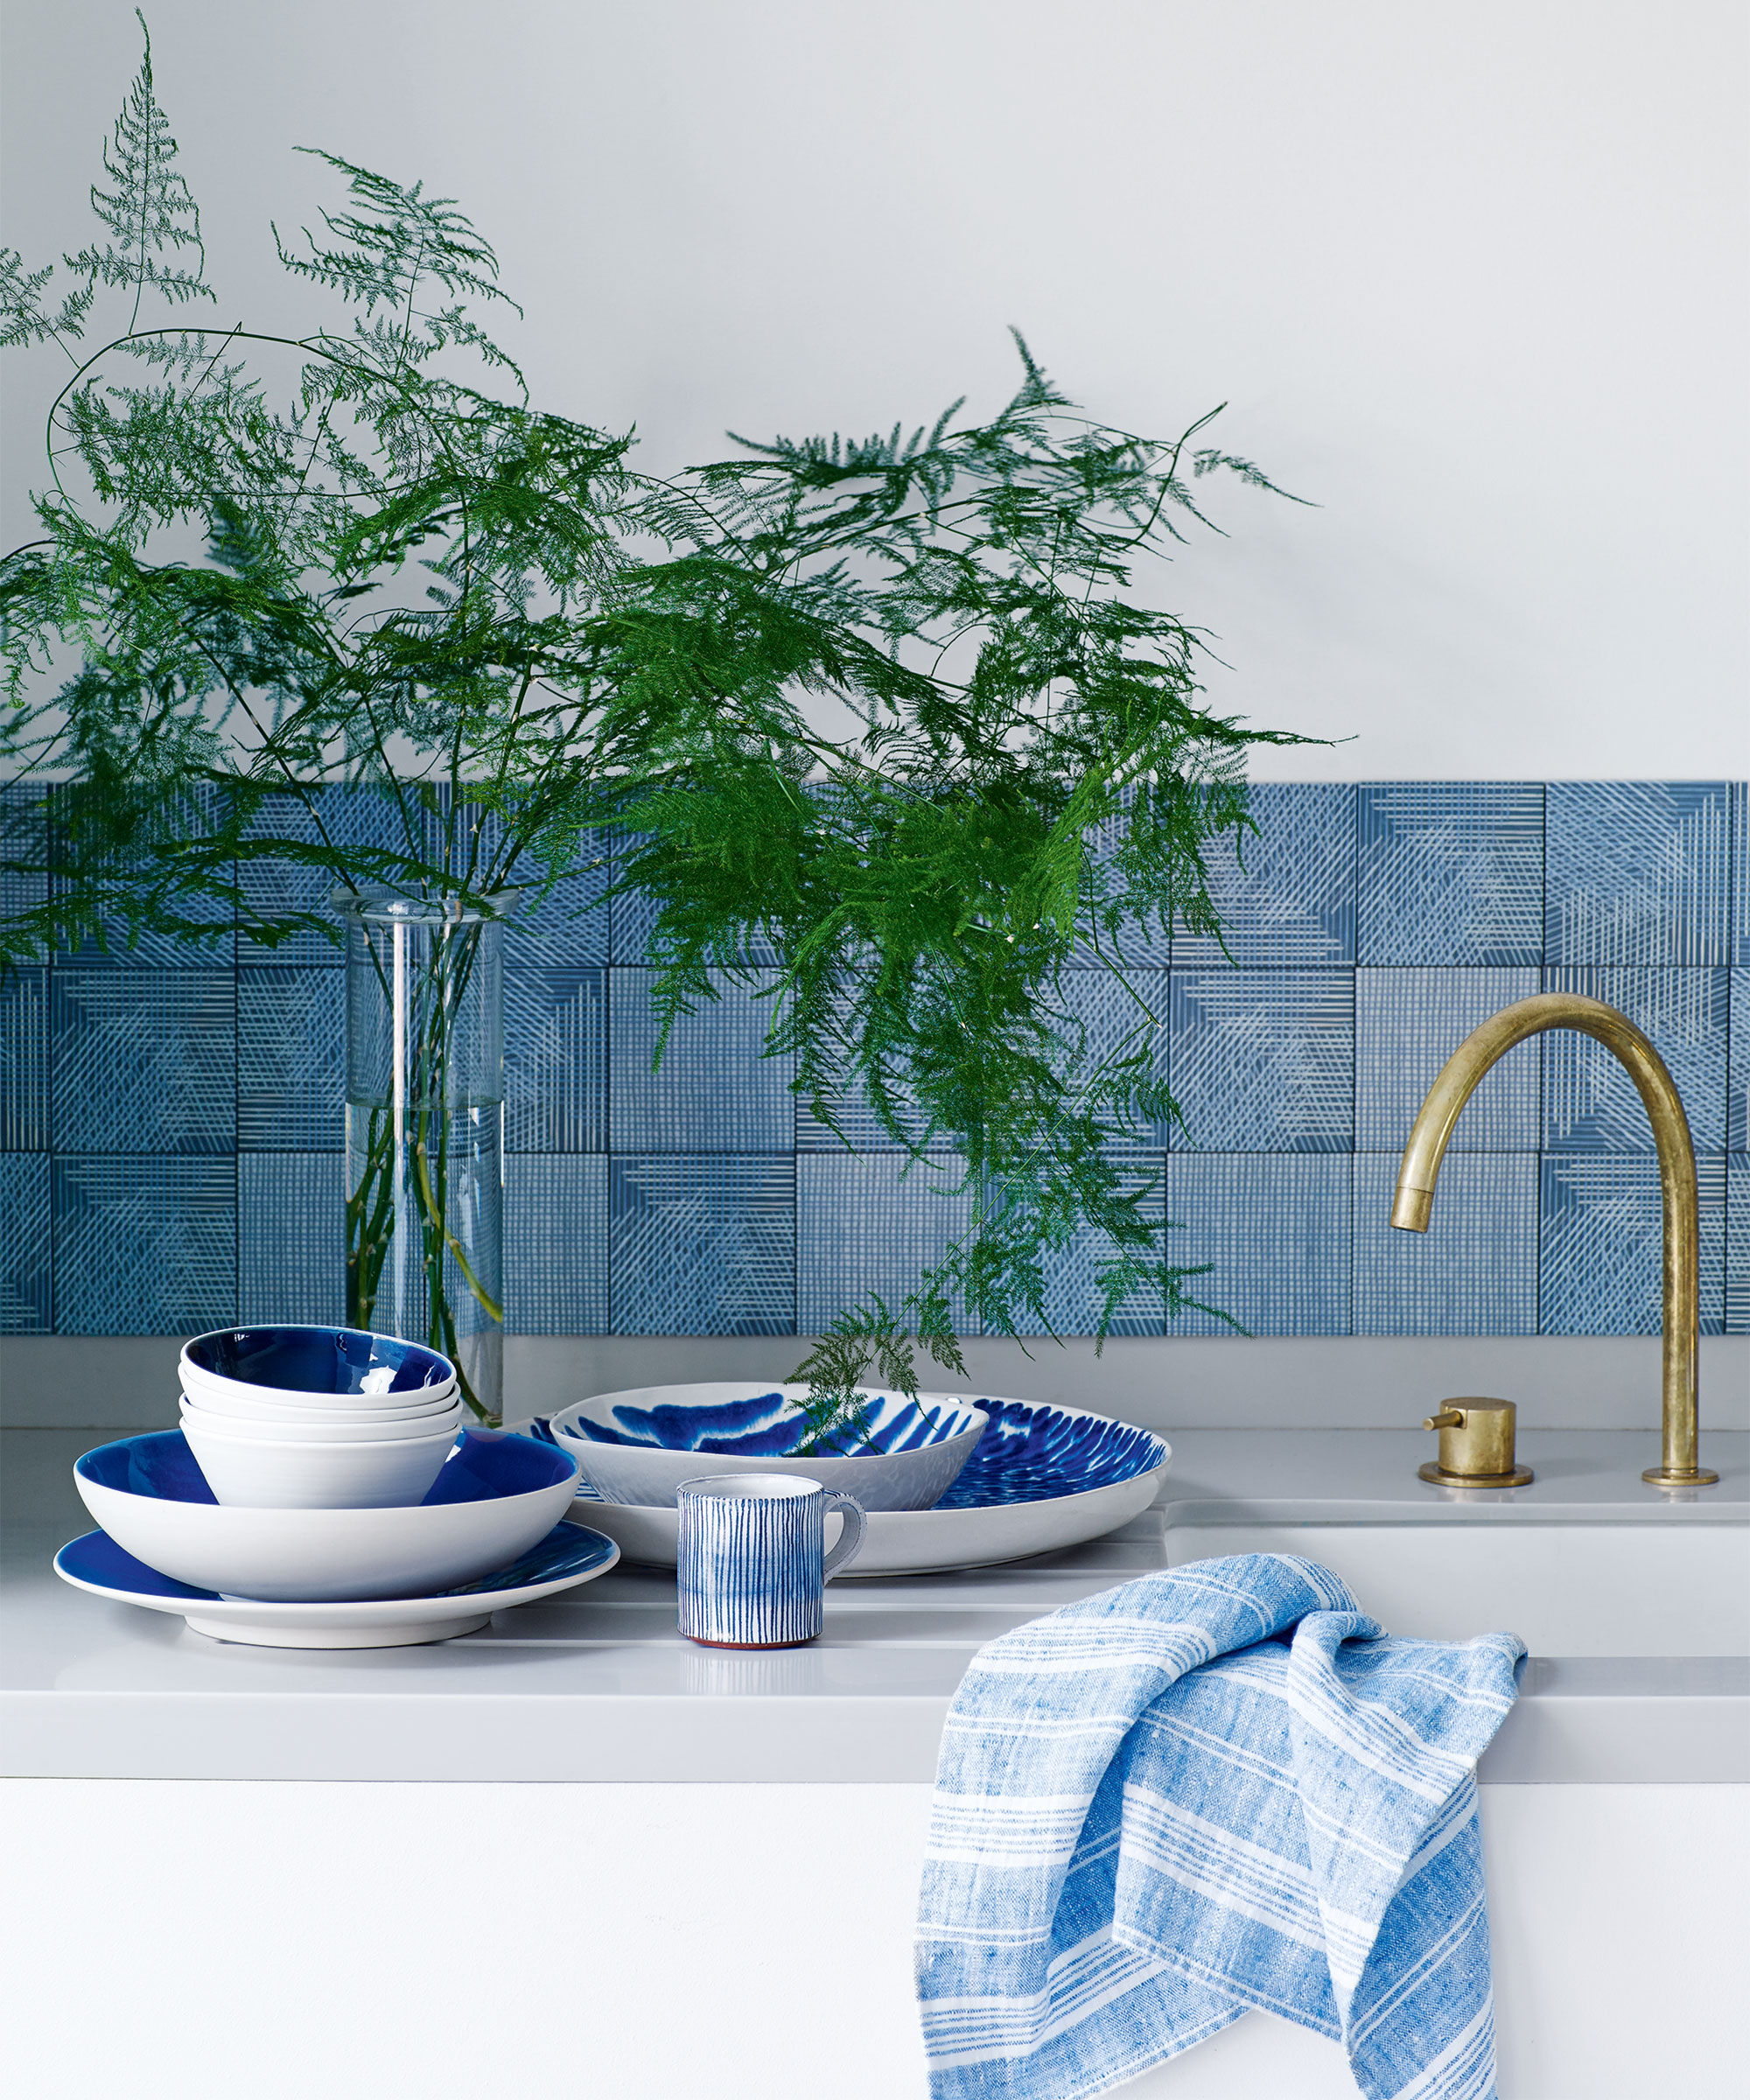
(Image credit: Future / Jake Curtis)
Is a backsplash piece of cake to install?
A new backsplash is easy to install – every bit long every bit yous accept the correct tools.
'Both bathroom and kitchen backsplashes are easy to install if you similar DIY,' says Kamila Chalfin. 'Backsplashes tend to be a fairly small area, providing y'all with a toll effective option that tin completely transform your space while minimizing kitchen tile costs, especially if yous cull a assuming pattern or shape.
'Always make sure you lot follow installation guides and have everything you need earlier starting – with tiling, it'south important you take a plan right from the start.
'Remember to decide what laying pattern you desire to include in your kitchen wall decor ideas – whether it's a straightforward brick pattern or something more interesting like a herringbone pattern – and select your grout color in accelerate, as this can completely transform the overall expect. Contrasting grouts will make the tiles truly pop.
'The latest tile trend for hexagonal shapes makes it even easier to create a backsplash, every bit you can leave the top section open to really accentuate the hexagonal shape.'
Kevin Lamming says your laying pattern can determine whether information technology'southward an easy or slightly trickier job, and existence prepared is essential. 'A backsplash is easy to install if properly prepared beforehand. This means selecting the correct cut equipment based on the tile in question and having everything needed to hand.
'The format of your kitchen wall tile ideas makes a big difference – installing a herringbone backsplash is much harder than a brick bond format. The bulk of the install normally is reasonably piece of cake, it's the edge and corner-cutting that may become slightly tricky.'
Tin can tiles be installed over a painted drywall?
Information technology is not advisable to tile over painted drywall unless it has been thoroughly sanded or sealed.
'You lot tin tile over sound existing tiles, painted or unpainted drywall, plaster and even textured walls, but it'south always best to follow the manufacturer's guidelines regarding the preparation of various surfaces and the products/accessories y'all may need to complete your project,' Kamila Chalfin says.
Amanda Telford, marketing manager at CTD Tiles, suggests being thorough with training: 'Emulsion paint, lime-wash, distemper and similar finishes should be removed since they can possess poor adhesion to bankroll. Solvent-based adhesives should not be used.
'Earlier you begin tiling, information technology'south important to ensure that all the pigment has been removed from the dry out lined plaster board surface. One time all of the paint has been removed, make sure that there is no droppings on the surface by washing with a damp textile, and assuasive to dry out.
'It is too strongly recommended to use a cement based adhesive on walls, however for smaller tiles in some cases a tubbed adhesive tin can be used, but it is imperative that all of the paint has been removed, one scrap of paint which is left on the wall could crusade a failure in that localized expanse.'
Kevin Lamming adds: 'You lot are able to install tiles over painted drywall, still this will required to be sealed with a primer. If yous are installing in a heavy moisture-utilise area,' – for case, when information technology comes to bath tile ideas, or a backsplash behind a decorated sink – 'you lot will require a no-more-ply or like board to be installed over the drywall, usually 12mm in thickness. Once the joints are sealed, you can tile straight onto this.'

Source: https://www.homesandgardens.com/advice/how-to-install-a-backsplash
Posted by: makrismamrainy.blogspot.com
0 Response to "How To Install A Tile Backsplash In Your Kitchen"
Post a Comment